
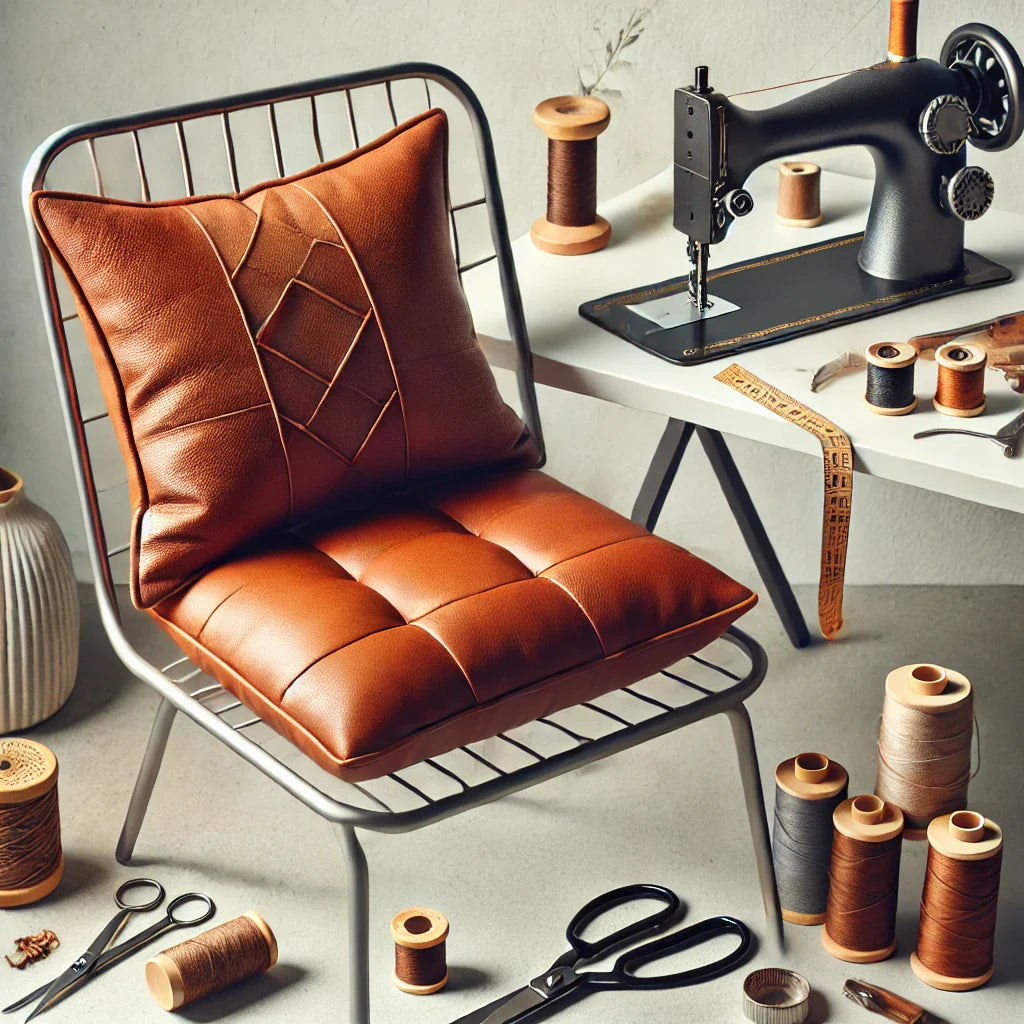
How to Sew a Leather Cushion
Share
"Crafting leather cushions isn’t just a skill; it’s an art that transforms spaces." Whether you're an experienced DIY enthusiast or just dipping your toes into sewing, learning how to sew a leather cushion can elevate your projects to a new level of sophistication. Leather cushions add a timeless charm to any room, blending durability with style.
Why leather? It’s simple. Leather cushions are not only functional but also embody elegance. They’re perfect for transforming cold, hard seats into cozy spots for family dinners or quiet moments. Plus, making your own cushions allows you to customize them to your specific needs, from the color and texture of the leather to the size and shape of the cushion.
The leather crafting world might seem intimidating, but with the right tools, techniques, and a touch of patience, anyone can master it. In this guide, I’ll take you step-by-step through the process of creating leather cushions, sharing actionable tips that simplify the craft. So, grab your tools—it’s time to dive into the rewarding world of leather sewing!
Why Make Your Own Leather Cushion?
Making your own leather cushion isn’t just about saving money; it’s about creating something unique and long-lasting. Here’s why you should consider it:
-
Customization: Tailor the cushion to your preferred size, leather type, and design.
-
Durability: Leather is tough and long-lasting, making it a great investment.
-
Sustainability: Use high-quality materials to ensure your cushion won’t need frequent replacing.
-
Creative Expression: Add a personal touch to your home decor by designing a piece that reflects your style.
Ready to start? Let’s break it down step by step.
Tools and Materials You’ll Need
Before jumping into the sewing process, gather these essentials:
-
Upholstery leather (choose a color and finish that matches your style)
-
Foam (for the cushion interior)
-
Leather sewing needle
-
Upholstery thread (preferably heavy-duty)
-
Sewing machine with a walking foot
-
Fabric scissors
-
Measuring tape
-
Clips or pins (binder clips work well for leather)
-
Marker for leather (non-permanent)
Step 1: Measure and Create a Template
Start by measuring the chair or space where the cushion will sit. Use these measurements to create a paper or cardboard template for your cushion. For added comfort, add a 1-inch seam allowance around all edges.
-
Tip: If you’re using foam, make sure the template fits snugly around it for a polished look.
Step 2: Cut the Leather and Foam
Using your template, cut the leather and foam to size. Mark the seam allowances on the leather using a fabric marker.
-
Tip: Use sharp fabric scissors to avoid jagged edges, which can compromise the cushion’s appearance.
Step 3: Sew the Leather Pieces Together
-
Place the leather pieces with the right sides facing each other.
-
Pin or clip the edges together.
-
Sew three sides of the cushion using a leather needle and heavy-duty thread. Leave one side open for inserting the foam.
-
Tip: Lengthen your stitch size to 3.5-5.0 mm for better handling and durability.
Step 4: Insert the Foam
Turn the leather cover right side out. Insert the foam carefully to ensure it fills the cover evenly.
-
Tip: Trim the foam slightly if it’s too snug.
Step 5: Close the Final Seam
Hand-stitch the open side using an upholstery needle or a staple gun for a tighter fit. For a more professional finish, consider adding a hidden zipper.
Additional Tips for Success
-
Practice First: If you’re new to sewing leather, practice on scraps to get comfortable with the material.
-
Use a Walking Foot: This prevents the leather from slipping and ensures even stitching.
-
Clean as You Go: Wipe your leather pieces with a damp cloth to remove any marks or debris before assembling.
Where to Use Leather Cushions
Leather cushions aren’t just for chairs. Here are some creative ways to incorporate them into your home:
-
Dining Chairs: Add comfort and elegance to metal or wooden dining chairs.
-
Floor Cushions: Create oversized leather cushions for a cozy reading nook.
-
Bench Seats: Upgrade entryway or bedroom benches with custom leather pads.
-
Outdoor Spaces: Use weather-resistant leather for patio furniture.
FAQs About Sewing Leather Cushions
Q: Is leather hard to sew?
A: Leather can be tricky, but with the right tools (like a leather needle and walking foot), it becomes manageable.
Q: Can I use regular thread?
A: While all-purpose thread works, upholstery thread ensures better durability for leather projects.
Q: What type of leather should I use?
A: Upholstery leather is best, as it’s durable and flexible enough for sewing.
Conclusion
Learning how to sew a leather cushion is a rewarding project that combines functionality with craftsmanship. With patience and the right tools, you can create stunning, durable cushions that elevate your home’s aesthetic. Whether you’re adding comfort to dining chairs or crafting floor cushions, this guide gives you the confidence to dive into leather sewing. So, what are you waiting for? Start stitching and bring your vision to life!
At Limassolian Leathers, we take pride in being expert leather manufacturers. We specialize in creating custom leather cushions tailored to your unique requirements. Whether you have a specific design in mind or need guidance, we’re here to bring your vision to life. Contact us today to discuss your bespoke order and add a touch of personalized luxury to your space.