
How to Repair Leather Cushion: A Step-by-Step Guide to Restoring Your Furniture
Share
"A stitch in time saves nine." This age-old saying perfectly applies to your beloved leather cushions. Minor rips and tears can quickly snowball into costly replacements if left unattended. But here's the good news: restoring your leather cushions doesn't have to be complicated or expensive! Armed with the right tools and techniques, you can handle most repairs yourself and keep your furniture looking as luxurious as ever.
Leather cushions are more than just functional; they’re a statement piece. When they’re damaged, it can feel like the heart of your living room has lost its charm. Whether it’s a tear, discoloration, or sagging, this guide will walk you through actionable steps to repair and restore your leather cushions to their former glory. Ready? Let’s dive in!
Why Proper Leather Maintenance Matters
Leather interior décor isn’t just a purchase; it’s an investment. High-quality leather cushions can last for decades if cared for properly. But life happens — kids spill, pets scratch, and wear and tear take their toll. Without timely repairs, even small damages can lead to irreparable issues.
By addressing problems promptly, you’re not only preserving the aesthetic of your furniture but also extending its lifespan. Plus, there’s something deeply satisfying about bringing a damaged piece back to life with your own hands.
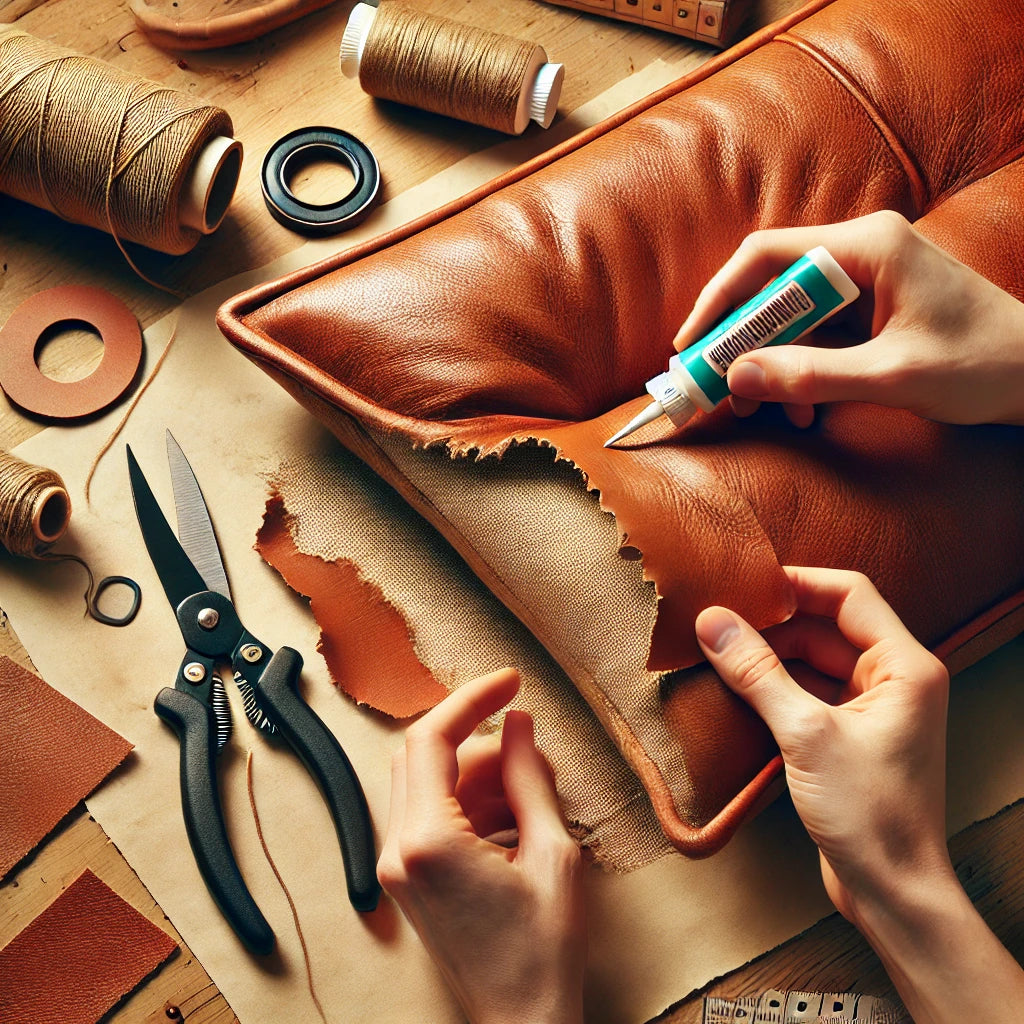
Tools and Materials Needed for Leather Cushion Repair
Before we dive into the steps, let’s make sure you’ve got everything you need:
-
Leather Repair Glue: A flexible, water-resistant adhesive that dries clear.
-
Leather Patch: Ideally from the same or similar material as your cushion.
-
Tweezers: For precision placement of patches.
-
Wooden Cocktail Sticks: To spread glue evenly.
-
Scissors: Preferably fine sewing scissors for detailed cuts.
-
Paper Towels: For cleaning excess glue.
-
Nail Polish Remover or Acetone: For cleaning any adhesive spills.
-
Vacuum Cleaner: To prep the surface.
-
Leather Conditioner: To restore the cushion’s shine post-repair.
-
Leather Dye (if needed): To match and restore color.
-
Foam Filler (for sagging cushions): To bring back structure and comfort.
Step-by-Step: How to Repair a Leather Cushion
Step 1: Protect and Clean the Damaged Area
Start by preparing your workspace. Lay down old newspapers or a drop cloth to protect the area from glue drips. Next, clean the cushion with a vacuum cleaner and a damp cloth to remove dirt and debris. If the tear has frayed edges, trim them with scissors for a smoother repair.
Pro Tip: Avoid scrubbing ink stains. Instead, dab them gently with rubbing alcohol for best results.
Step 2: Create and Insert Your Leather Patch
For larger tears, cut a leather patch that’s 3-4 cm larger than the damaged area. Round the edges into an oval shape to prevent snagging. Insert the patch beneath the tear using tweezers, ensuring it lies flat. This step is crucial for reinforcing the repair.
Quick Tip: For small tears, you might not need a patch at all. Apply glue directly to the edges and press them together.
Step 3: Apply Leather Glue
Lift one side of the tear and apply a thin, even layer of Leather Repair Glue to the patch underneath. Use a cocktail stick for precision. Repeat on the other side. Keep paper towels handy to clean any excess glue immediately.
Why Leather Repair Glue? Unlike regular super glue, it dries flexible, mimicking the natural movement of leather.
Step 4: Pinch and Bond
After waiting five minutes for the glue to become tacky, carefully pinch the edges of the tear together. Smooth out the join with your fingers or tweezers, ensuring the edges align perfectly.
Step 5: Press and Wait
Apply firm pressure to seal the repair. Allow the glue to dry completely (usually 24 hours) before using the cushion. To speed up drying, you can use a heat gun on low heat, but natural drying is recommended for the best results.
Refilling Sagging Leather Cushions
Sometimes the issue isn’t a tear but sagging or flattened cushions. Here’s how to fix that:
-
Check for Zippers: If your cushion has a zipper, simply open it and remove the old filling.
-
Replace with Foam Filler: Use foam wrapped in fiber for a cost-effective and supportive solution.
-
Smooth It Out: Ensure the new filling reaches all corners for even support.
-
Seal and Test: Zip the cushion back up and test its comfort.
For cushions without zippers, you’ll need to access the filling by carefully unpicking a seam. Be sure to sew it back securely once refilled.
Restoring Color to Leather Cushions
Discoloration can make even undamaged leather look worn out. Here’s how to restore its color:
-
Choose the Right Dye: Match the color closely to avoid patchy results.
-
Prep the Surface: Clean the cushion thoroughly to remove oils and dirt.
-
Apply Dye Evenly: Use a sponge or cloth to dab the dye onto the leather. Test on a hidden area first.
-
Seal the Color: After the dye dries, apply a leather conditioner to protect the surface.
Pro Tip: Multiple thin coats yield better results than one thick application.
Preventive Maintenance for Leather Cushions
Prevention is better than cure. Here’s how to keep your leather cushions looking their best:
-
Vacuum Weekly: Remove dust and debris.
-
Condition Regularly: Apply leather conditioner every 3-6 months to prevent drying and cracking.
-
Avoid Direct Sunlight: UV rays can fade and damage leather over time.
-
Protect from Sharp Objects: Pets’ claws and kids’ toys can easily puncture leather.
-
Use a Protection Cream: This adds a protective layer against stains and spills.
FAQs About Leather Cushion Repair
Q: Can I use regular super glue for repairs?
A: No. Super glue dries rigid and may cause the leather to split again. Always use a flexible leather glue.
Q: How do I remove excess glue?
A: Use a paper towel immediately or acetone for dried glue.
Q: What’s the best filler for sagging cushions?
A: Foam wrapped in fiber is an affordable and effective option.
Final Thoughts
Repairing leather cushions is a rewarding process that saves you money and preserves the beauty of your furniture. With the right tools, patience, and this guide, you can handle rips, tears, discoloration, and sagging with confidence. Remember, every repair is an opportunity to extend the life of your investment and keep your space looking stunning.
Whether you’re a DIY enthusiast or just someone trying to rescue their favorite sofa, these steps make it easy. So grab your tools and get to work — your leather cushions will thank you!